
Misting is all the rage right now in the scrapbook world and here at QuicKutz we have all the tools you need to start creating your own masks to use with mist or ink!
Start gathering your supplies because this is truly a fast and easy process.
You will need the following:
QK Vinyl
Your favorite QK Tool and dies (I used the Silhouette)
Mist, Ink or Colorwash
Cardstrock (heavy weight)
Bone Folder
12x12 (or larger) cardboard box
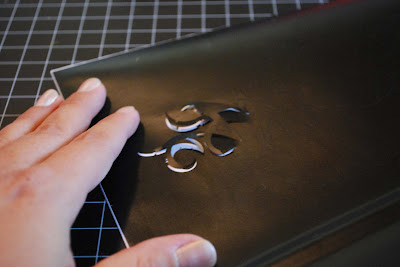
Begin by using your QK Tool to cut out your desired shape. Here I used the Silhouette to cut out the grunge baseball title. Remove the shape from the vinyl and adhere it to your background cardstock.
Flip your cardstock over and use a bone folder to really seal the edges of your mask.

Next place your background paper inside a cardboard box and take it outside to spray your paper. You'll want to start out at least six inches from the paper and begin with a few light spritzes until you get the feel for how much color is being applied with each spray.

*Note: You can also use ink and a blending tool to cover over your mask. Be sure to use the blending tool in a circular motion so you don't have any lines on your finished piece.*
The next part is the hardest for me . . . wait until the mist is completely dry before you remove your mask. Some mist will be on the mask—if you remove it too fast you risk letting that bleed into your design. Once it's dry remove your mask and begin creating!

You can see on my layout that I cut the outline of the baseball with red cardstock to match their team hats using the 2x2 baseball cap die!
Be sure to post your own fabulous misted creations in our Online Gallery at Quickutz.com.
Happy misting!
Houston Stapp, QuicKutz Ambassador


